Step-01: Install the app
-
You can install the app from the Atlassian Marketplace
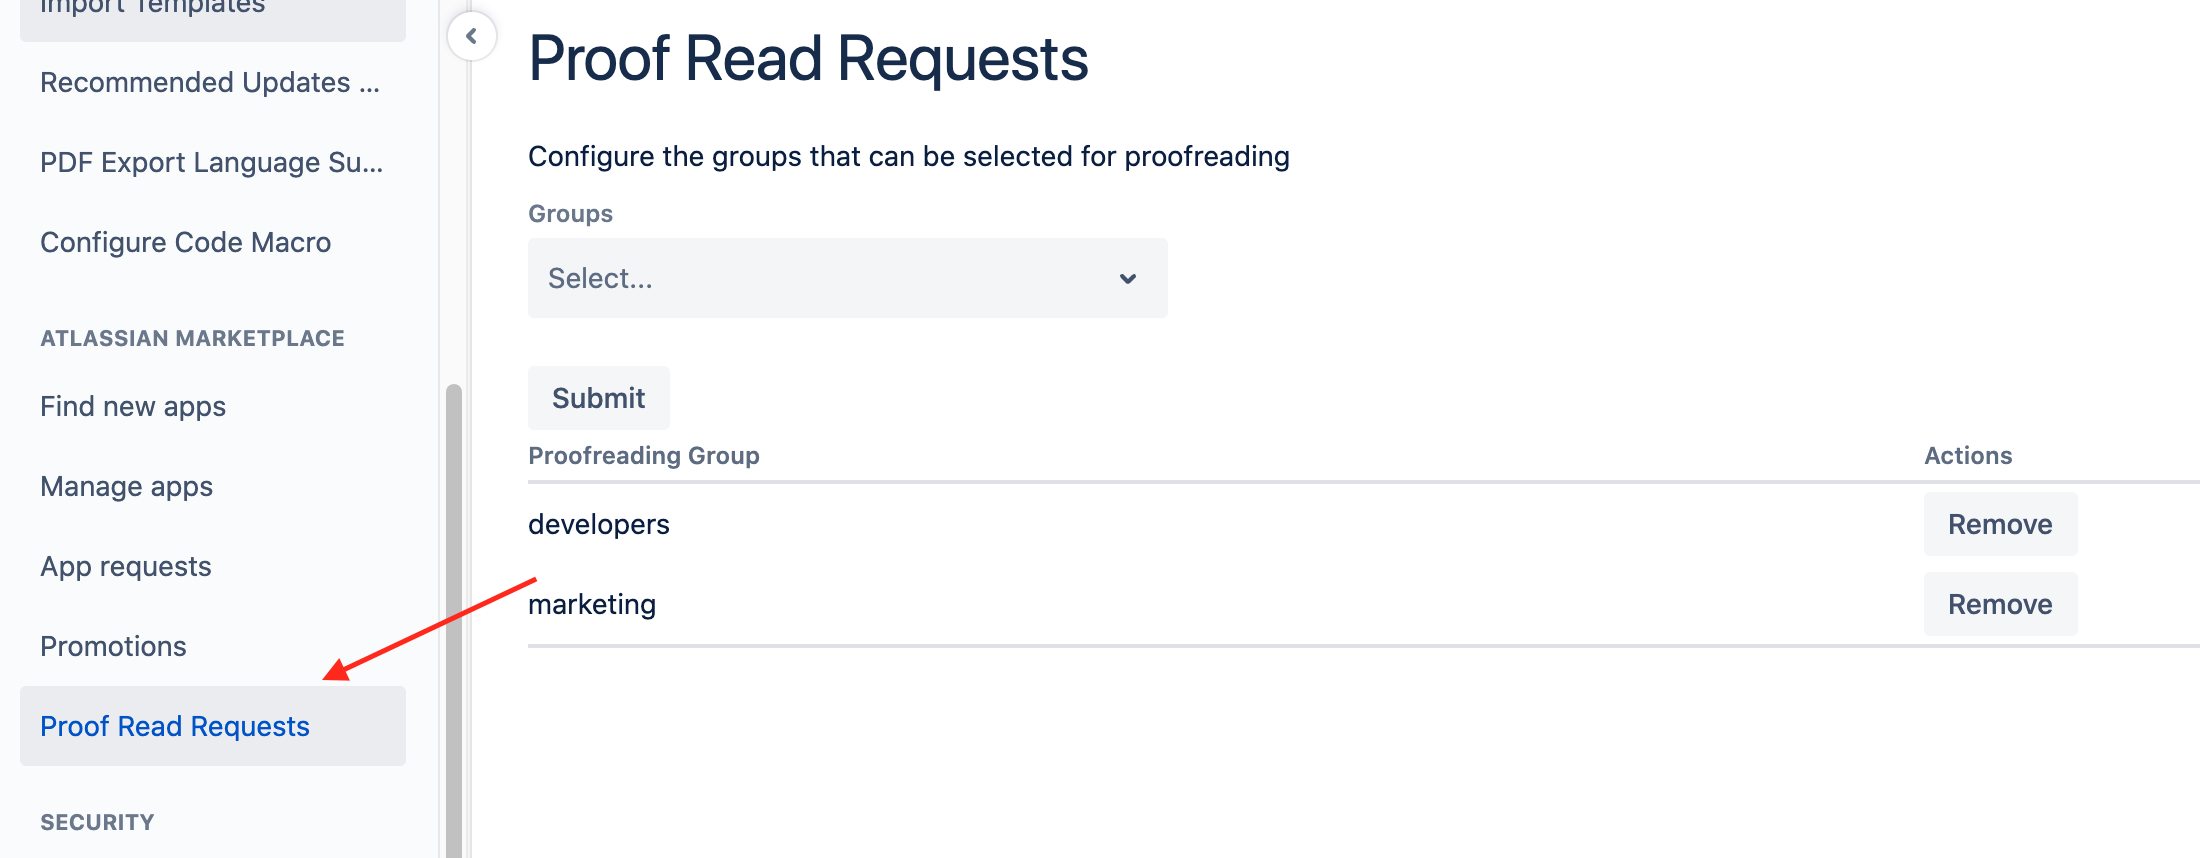
Step-02: Configure Proofreaders
-
Head over to the administration page and add some groups as proofreaders
Step-03: Create a proof read request
-
Open the byline item on a page and create the proof read request through the dialog.
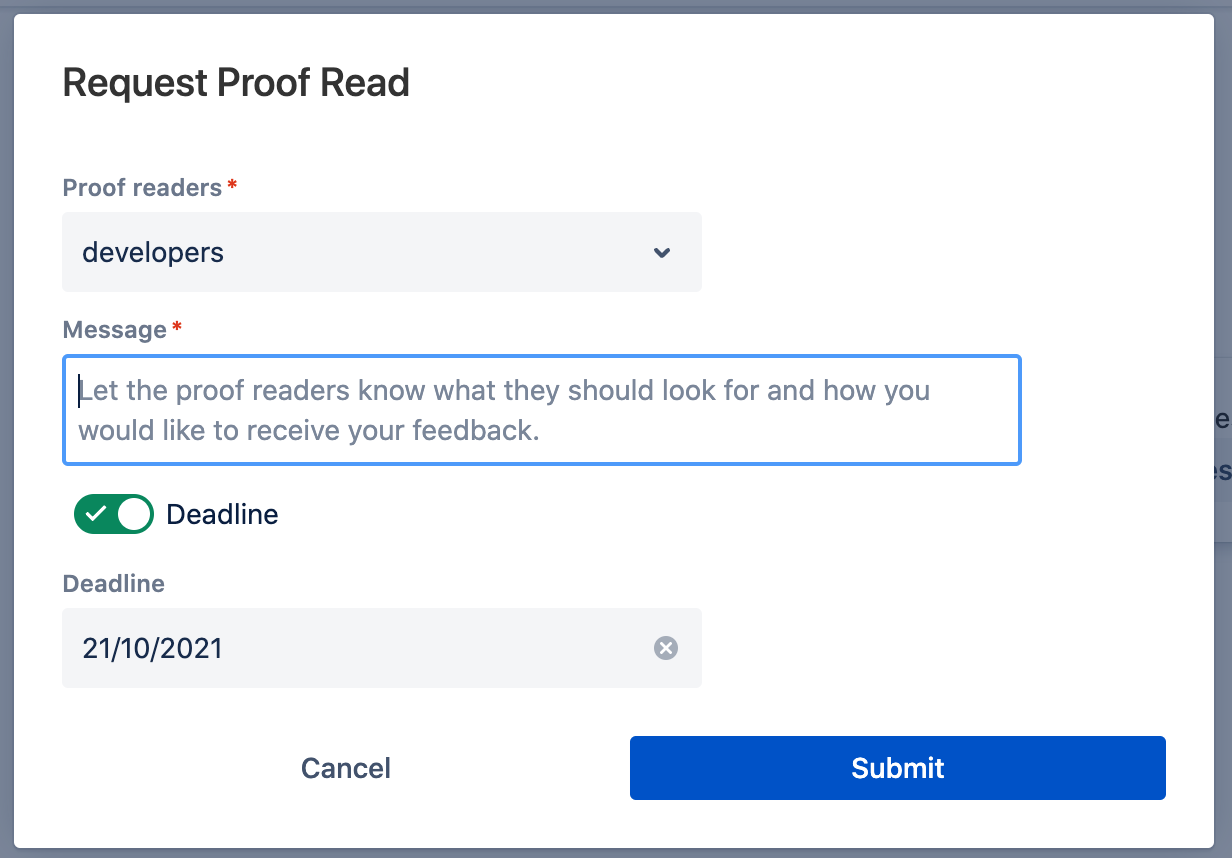
The dialog has the following fields:
|
Field |
Description |
|---|---|
|
Proofreaders |
The Confluence group which should proof read this page. |
|
Message |
Tell the proofreaders what they should look for when proof reading the page. |
|
Deadline |
The date until which the page should be proof read. proofreaders will see their open requests in the order of deadlines. |
-
The proof read request can be resolved by a proofreader through the byline item after proofreading the page.
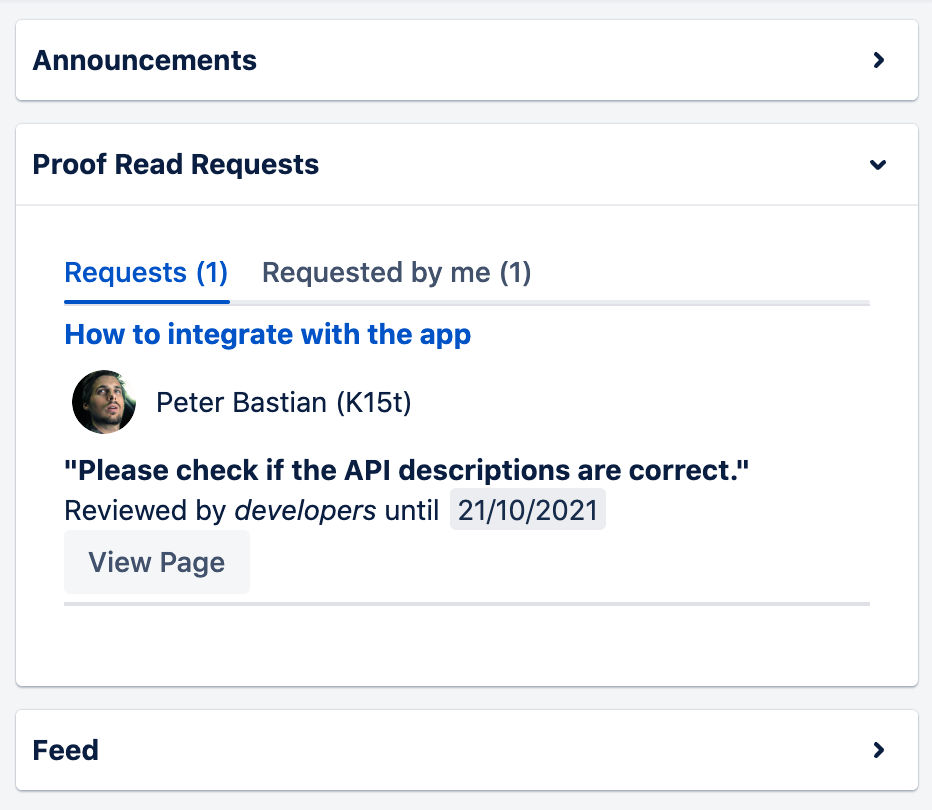
Step-04: View your open proof read requests
-
Go to the Confluence Home and open the Proof Read Requests feed.
-
It lists all proof read requests requested by you.
-
If you are a proofreader, it also lists all requests for you to proof read.
Step-05: Proofreading a page
-
Go to the page and start proofreading.
-
Add some comments or let the requester know in any way you want what needs to be changed.
-
Once you finished proofreading, close the request through the byline.
That’s it, you just finished your first proofreading in Confluence!